[This article updates one that appeared in PS 780 (Nov '17), pp. 36-37, particularly the section on bleeding the air from the hydraulic system.]
Exercise, exercise, exercise. The worst thing you can do is let your HIMARS sit for weeks. Without exercise, grease coagulates and moving parts like the limit switches and rollers stop moving and start sticking. The flex drive shaft binds and can be damaged. Taking the launcher-loader module (LLM) through its paces weekly can prevent these problems.
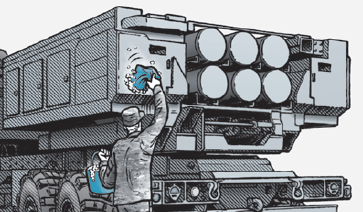
Clean, clean, clean after firing. Rocket residue is very corrosive. If you don’t clean it off ASAP, then you soon have major and expensive corrosion problems. The bad news is that the only way to get rid of the residue is with lots of CLP and elbow grease. The good news is that the sooner you clean, the easier the job is.
 Use CLP and clean after firing
Take it slow and keep it straight loading and unloading rocket pods. Raise and lower pods as straight up and down as possible. That prevents cables from fraying and makes it easier on the LLM motor. Keep an eye on the cables to make sure they don’t twist and become tangled. Stop and reposition the pod if necessary.
No slaving from launcher to vehicle. That can cause a power surge that damages expensive electronic components or kicks on the fire control system.
Pay attention to torque when putting on wheels. The tires have aluminum rims that can be damaged if tightened too much. Follow the procedure in TM 9-2320-450-13&P (Jan 19). Torque the wheels in sequence following this chart:
 Torque your lug nuts
Torque them first to 40 ft-lbs, then 150-200 ft-lbs. Next tighten the CTIS lug nut to 150-200 ft-lbs and then tighten the nine (9) non-CTIS lug nuts to 350-400 ft-lbs. Finally tighten the CTIS lug nut to 350-400 ft-lbs.
Make sure to bleed the air from the hydraulic system before bleeding the air tanks on the truck. Place a bucket under the air side bleed valve and a rag over it to catch any hydraulic fluid. You can find the full procedure in TM 9-1055-1646-13&P (Jan 19).
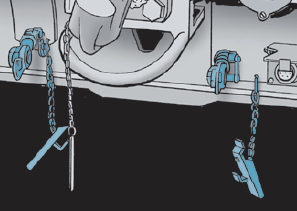
Install glad hand covers when glad hands aren’t being used. Bugs think the glad hands are great places to nest and the wind blows dirt in the receptacles. Bugs and dirt cause blockages and you’ve got air pressure problems. Plus the covers help keep the glad hand seals from drying out and leaking.
 Glad hands should be covered